Showing posts with label tutorial. Show all posts

Friday, November 30, 2012

Let's Join the Lolita Blog Carnival! (Episode 3- DIY Gift ideas!)

Dear Kitten Cotton Candy Bubble Gum Kids, (<3)

Another post for the wonderful Lolita Blog Carnival!

I really don't have many ideas for this particular topic because I am not currently the greatest at DIY projects (I wanted this topic to win, because I wanted to hear everyone else's ideas to help me!). I need to buy materials and that is just not possible for me right now. I do sit around watching a LOT of videos on how to make things some days though and that may be just enough to help you all with your gift making needs. It can be easier if all the links are put in one place!

With Christmas right around the corner you may be feeling the stresses of what you should get everyone you love. I know I am! With only 50 dollars to spend on everyone for Christmas, I'm going home for Christmas so I can't get a job until I get back. If your on a budget like me you may be wondering what you can do to see that smile on all your loved ones faces and if you thoughtfully make them something from your heart the smile is sure to grow even bigger!

I separated some different links to DIY tutorials into different levels of difficulty so it will be quicker and easier for you to find something at your skill level. I will also offer my own personal advice on each tutorial. Now, welcome to my secret world of cute tutorials!

EASY (Cheap, Little to no sewing)

 Glass Bottle Charms! 
   Fairy in a Bottle- More delicate wings could be easily made with tulle and wire! You could also glue on some sparkling shapes like hearts and stars onto your fairy wings. The body could be substituted with a bead or two, but the wire wings likely won't go on as well. A different shape could be made with the Polymer clay for a different kind of fairy look. This tutorial compares to this expensive charm on Etsy. If you would like to copy the look of this charm suspend your fairy in clear soap. Put half of the clear soap in your bottle then carefully place your fairy in and cover the rest with soap. If you want your fairy to be more secure you can combine the fishing line technique in the tutorial with the soap method (It just might get a little complicated I'd imagine, but I believe in you!). This fairy from etsy looks like it could have been made with tulle and wire wings and a fake pink pearl body. The charm could be replicated if that look is one you would rather have for your charm. If you use a clay fairy and want it's body to be sturdy you can bake it! Polymer clay is pretty easy to bake (or) and I've been wanting to try my hand at making polymer clay charms myself. 
   Standard Easy Bottle Charm- This is very very easy, but still so cute! Your friends will love them, wouldn't you? Bottle charms will work for anyone! Just make sure the colors and bottle filling fit their own unique style and personality! So many ideas!
   ★Special Meaningful Bottle Charms- This is by far my favorite of the bottle charms. I remember having a fairy dust necklace when I was younger and I wore it all the time then cried when it broke. Something about the idea of magic touched my heart even if it was just glitter(which it wasn't!). Your friend will appreciate the fact that you were thinking of them when you made this adorable gift! The different ideas for a meaningful bottle charm are fairy dust, love potion, nightlock berries(The Hunger Games, or), fairy glow(just put it in a bottle and maybe add some glitter), some of your blood (lol not really :P), message in a bottle, dragon tears, Alice in Wonderland "Drink Me", Harry Potter potions and other magicalness (unicorn bloodDrink of Despair,Gillyweed,Polyjuice Potion, there are many many more possibilities and she has several on her channel here), the possibilities are endless! Just use your imagination and glue on some labels if you want!
♥ Polymer Clay Charms! 
   ★Polymer clay can do anything! You can make something for everyone! Remember those bottle charms from earlier? You could use white glue or soap and white paint to make a bottle of "milk" and you could use polymer clay to make a chocolate chip cookie and just put them both on a key chain. Also, you could take your Alice in Wonderland "Drink Me" bottle and you could pair it with an "Eat Me" cookie for a complete set! Here I will share a few tutorials that may help you create different polymer clay charms. I'm putting them in neat and easy categories based on Lolita sub-styles, but you know your friends best and what would fit them the most. I will only provide a few examples of what you can make so you can have the joy of making your own charm or finding a tutorial that best works for you. 
    ♥Sweet Lolita
Cute Scented Cookie Charms, Rainbow Macaroon Cake CharmBow Ring (Could also make a cupcake ring or whatever you want~) 
    ♥Classic Lolita
Rose, http://www.youtube.com/watch?v=JQ7rS1QmdoMFrench Pastry Charms, Elegant Pendant
    ♥Gothic Lolita
Scented Halloween Cookie Charms(works well with Dark Fairy-kei too! Creepy-cute), Black Love Charm, Cross Charm, Black Cat Earrings

It would be fun for all of the above to make polymer clay friendship charms!    

You can buy little cork bottles at Micheal's, Hobby Lobby, or online.(It may be good for key chains and jewelry charms if you can find a plastic version instead of glass so it is harder to break) 

You can buy Polymer clay at the same places generally, here is a place to buy it online.

MEDIUM (Not too hard, may require some sewing)
Bows
  ★BOW TUTORIAL LINK ATTACK GO! Bow(Sweet) Bow Bow Earings Ribbon Bow Clips Bow No Sew Bow Headband Alice Bow
Doll Clothes
   ★ Is your friend a doll person? I know this Christmas I'm hoping to be able to get some cute dolls and accessories(I want a Blybe and Tangkou England)! I would be very happy if my friends made me clothes just for the occasion! Before you do this make sure you know your friend has or is getting a doll and make sure you make clothes for the correct type! Sewing patterns, doll dress tutorial  
Other Accessories
Headdress or, Half Bonnet 

ADVANCED (Use a rather high skill level and/or cost more to make)
Actual Lolita Clothes!
    ★ If you have the time and ability I'm sure your friends will be shocked and delighted to find out that this Christmas they are getting Lolita clothes handmade with love by you! Here are some helpful tutorials for this project here here here here For a lot of tutorials from one girl go to this channel she has many many tutorials. 
Metal Jewelry
   ★ I know it can be done, but I can't do it! It could be a great gift if you know how to do this. I tried to find some tutorials to help also! here I'm not sure what to recommend, but I wish you the best of luck! here 

Maybe you could write a meaningful card! Cards can go with your gift or even be the gift themselves. (If you can draw, or even if you think you can't, the card may be prettier with lots of special drawings!)


Other super blogs who also joined in on the fun!
tbc...

This took a lot longer than I expected! It was just a bunch of links after all. I'm very tired and my computer actually died half way through this and I had to rewrite some of it. I hope you enjoy all the thousands of links and ideas that I suggested and have a wonderful time making cute gifts!! If you make any gifts for your loved ones pleased show me I would love to see links!~ <3

Y-Y-Yours, 

Skiteanna La~Sweet

Thursday, November 1, 2012

Let's Go Trick Or Treating! (Improvised Halloween Costumes, Happy Halloween!)

Dear Cutie Oogie Boogies,

Happy Halloween!!! (uhh...sorta! Pretend it's still Halloween I had so much trouble with my sister's phone and getting the pictures we took from Halloween on my computer :( )

This year I wanted to go as the ever adorable and fantastic Draculaura from the wonderful like of Mattel dolls, Monster High. Though at the store if I wanted the full costume (a 14/16 in girls they had and a wig) I would of been set back at least 45 dollars (YIKES!!) I would rather spend that on clothes for all year! So I decided to think of something else. I put together a costume entirely with things I already owned! Let me show you...


This is the Draculaura costume I wore for Halloween! I have the doll that I carried around also. Let me tell you what I did. I looked through what I had and put together the closest thing I could to her actual outfit, I also had another outfit ready that I thought looked like something she might wear since of course people and monsters don't always wear the exact same outfit every time! I wore the outfit that looked like the doll I had since I thought the twinsies would be cute! For a Draculaura costume all you really need is a good mixture of pink and black in an adorable outfit! If you want a costume that looks like mine I'll tell you each outfit component I used. 
Head: I actually picked up this pink pigtail headband from Goodwill since it was cute and charming and only a couple dollars, since my hair is fairly dark I just put it up in pigtails with my hair and it turned out pretty good, a lot better than spending 25 dollars on a cheap wig I would only wear a couple of times. If you don't have something like this, you could just get pink ribbon to tie in your hair or color strips of paper pink and put them in your hair. If your hair isn't dark you could get just black hair spray and then do the former instruction (Though I think buying black AND pink spray would be better in price than the wig, but I don't know for sure.) I added a bow even though she doesn't wear one because I thought it topped off the outfit well. I did simple makeup, just sunscreen and pink powder over it then drew a pink heart with sharpie on my cheek. My lips have a simple red, but you can't go wrong with pink, dark purple. or black lipstick. After that I wiped off a little off the bottom lip and drew on fangs with some of Megan's face makeup (You could use white eyeliner or anything you feel would work really.) 

Neck: That is just a cute flowery shawl my aunt let me borrow for Halloween!~ You could use anything you want. I think a filly handkerchief or anything white and frilly would work great, actually anything white a splash of white is all you need so anything white you can find should work fine.~

Torso: I am wearing this pretty lacy black long sleeved shirt that, again, my aunt let me borrow. Over that I have a simple hot pink tank top from Rue 21. ( I actually think the black shirt was bought at Rue 21 too) Just whatever long sleeved (or short sleeved) shirt you can find should work, over that anything pink and with less sleeve (a hotter pink preferably) She wears a pink vest, or you could add white buttons to your pink top it would help.~ 

Bottom: I have a black tulle skirt borrowed from my sister under a white Bodyline petticoat that I almost never wear because it lost it's poof right away and isn't really cute enough to wear as a fairy kei tutu. If you have a white skirt, that would be perfect. Something white is the most accurate, but another color could be worn. I have a below picture of another version of this outfit with a different skirt. 

Legs and Shoes: Just whatever you have should be fine. If you can find black tights and some kind of pink shoes. If you can't find black tights, that isn't really a big deal (she's wearing short fishnets anyway) you could use a different color tights, socks, or go without whatever you prefer. If this is for Halloween it can be harder to see your shoes when it gets dark and if you plan to be walking a lot you want something comfortable. This category is the easiest to not be perfect on. The shoes I have on are from Bodyline and the tights I think I got in a pack at Rue 21, I have all kinds of black tights that come packaged with my white and pink tights and I almost never wear them so this gave me a chance. 

When picking an outfit take the weather into consideration! I was hot when the sun was out, but was perfectly cool once it went down. I live in Texas and it can still get pretty hot this time of year! <3 


This is the same outfit with a different skirt! Skirt is from Goodwill~

This is me with Mckinley! All this costume he wore is a sharpied mustache ( I drew it on for him) 3d glasses with popped out lenses and a hat (normal clothes otherwise) He wasn't feeling well and didn't go trick or treating, but I wanted him to feel included. I made him a name tag also, it says Hi, my name is Mr. R Butts (He wanted it to say that so why not? XD) He went as a fancy pants fast food employee I think! Easy improved costume if you don't wanna spend money~! 


Another picture of us in our costumes, also for a candy bag I just used my purse because I thought it matched and it was plenty big enough~

I went quite a few places this October! This is me with a group of friends we just threw together last minute this group costume idea. We went as kids on the Polar express and just wore night clothes a robe and carried stuffed animals! I brought my giant Cheer Bear, wore my big pink night shirt, frilly bloomers a borrowed robe thing, and my cute fluffy pink kitty slippers. I also just threw my hair up in cute pigtails~ Also, LOOK WE MET BATMAN :DD

Sadly, this was the best picture we got of Mckinley wearing his Clawd Wolf costume :( (Clawd is Draculaura's boyfriend) All he had was a wolf mask he cut the face out of and some nice clothes. (I actually went trick or treating twice this one rich neighborhood did trick or treating early and Megan had friends there that invited us. Mckinley went this time, but was sick on Halloween.) 

We also met Tony the Tiger! We went to this little Halloween carnival thing. This was the day I wore the Draculaura costume with the peachy pink skirt and I actually won the best costume for kids 10 and up! I think it was more the smile and hopefully cheery look on my face that won it, rather than the costume itself. (I got a pink monkey doll and "winner" plastic metal thing, I was really happy to have won, haha!) Megan (In the purple shirt) went as a volley ball player which is a pretty easy improved costume too! 

So there you have it! My improved, cheap, Halloween costumes this year! I hope this can help you for next year if you happen to want to go as anything I did this year~! <3 I hope your Halloween was super happy and you got a lot of candy, just don't get sick eating it all!!! <333333

Also, if you were wondering my guinea pig, Sugar, has started improving a lot! She can move on her own now, just not as well, but it's a start! I should resume blog entries after this one very soon. 

Spookily Yours,

Draculaura, I mean Skiteanna La~Sweet


Friday, July 13, 2012

Let's Be Creative! (Simple and Easy Tutorial For Decorating Your Cellphone!)

Dear Chocolate Coated Truffle Pigeons,

Do you have a boring cheap phone that you just don't like that much? Do you wish your dull grey phone would match your colorful personality? Do you like everything in your life to be cute, but think you just don't have the money or skill to do anything yourself to MAKE the things around you cute and pretty? Well then, stay tuned to find out how my phone went from cheap and boring to a pink sparkly gem among my possessions! I am don't have a lot of money or skill, but did have a lot of success!

Here again for another glorious Friday! Today I will be writing a mini tutorial on how I turned my simple cheap grey cellphone into a cute pink cellphone that I just love!

This method isn't for everyone and may not be good for your own cellphone. I would recommend something else for the newer cellphones that are expensive with a huge touch screen. This is more for older phones, usually flip phones, with a lot of area for color! Let's get started!~

(Pictured is the Samsung Gusto 1) This is what my cellphone looked like before~ (This is the picture from the internet since I didn't take a picture before I started since I got the idea to make a tutorial after I was finished, but it is this model.) Look at the cute kitty~ ovo


~Step 1~ Read the instructions of the tutorial before you begin so you know what your getting into. If you need to, ask permission from your parents first. (I am not responsible for you ignoring that instruction XD) After you do that and you are sure you can and want to do this let's begin!

~Step 2~ Make a plan and find a nail polish!

I suggest picking a nail polish color that would match your wardrobe, I used a pink because most things that I own are pink, that is my favorite color!~ If you are a person who likes nail polish, it will be a lot easier to find a color, though if you really wanted to you could stop by the store, a garage sale, or a friends house and buy or borrow some nail polish(Which would usually be rather cheap) I recommend picking a nail polish that does well on your nails before you go putting it on your phone! A good quality nail polish will make it easier, but I wouldn't stress terribly about it. Also, make sure the color is one that will look good on the phone! I would suggest not using too many colors or getting TOO crazy, sometimes being simpler can really help the final product. Get a piece of paper and draw your cellphone, find crayons or colored pencils, or even markers that are close to the nail polish colors you want to use and color it in! Once your satisfied with the design you can move on to the next step.

~Step 3~ Now that you have your phone, your nail polish, and your plan it's time to start painting! Make sure you only paint in one direction and are VERY careful around areas you do not want to paint. I would have cue tips and nail polish remover handy just in case. Also, you can use tape and tape off areas that have screen showing. When I did my phone I cut off tape to place over the front screen, but I found you must be VERY careful or when you take it off it could tear holes in your paint job. I think it may be best to cut the tape smaller than the screen so there are still gaps between the tape and the paint job so that most of your screen is protected, but you won't ruin the paint job. Still, be VERY careful around the screens. This is the most difficult part. Apply an even coat and at this point you may be panicking because it looks like a complete mess! Do not panic little ones <3~ This project requires a lot of time and many many coats of nail polish. I spent at least 2 or 3 hours with my phone open painting it. Let each coat dry and apply a new one evenly until it looks good! At the end I had about 6 color layers. I painted my phone in the open position and painted right onto the dark grey surface and none of the color still shows through. Just make sure you have a good amount of nail polish, but when I did it I had already used a good amount of the tiny bottle of nail polish to do my previous phone that looked almost exactly the same, but was stolen! (It was very sad, but I think it says something about the paint job! Who would steal a 10 dollar minutes phone if it were plain? BUT a pretty one I guess is worth stealing to some people :') ) I had barely any left in the bottle when I started the project this time and though it didn't look as good, it was still very effective. Now that you have your phone painted and you are pleased with the result, lets move on! (Let it dry overnight at some point before you add things)

~Step 4~ At this point you should have a dry phone painted the color of your choosing looking FABULOUS! If you had some slightly uneven coats you may see bumps or imperfections in the coat when you look closely. Do not fear! This next step will make these things unnoticeable! I strongly recommend selecting a clear nail polish with sparkles in it and applying it generously all over the phone's coat of nail polish.
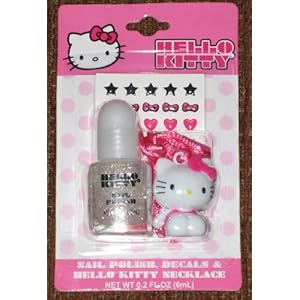
Something like this would be good, actually if you could find a nail deco kit that could come in handy too!

Let the coat of sparkle dry and you'll see that it really helped the overall look! Once you are finished with that and everything is completely dry, I suggest a top coat! Something that will really seal in the color.  


Pictures of my phone took on my less than amazing camera at this stage in the process~ See how the sparkles really help even things out? 

~Step 5~ (This is the most optional step and if you are already completely happy with the product, skip it) Time to decorate!! If you are the kind to collect stickers or things like that, they would be great to add at this point! Think again about where you would like things before you place them. Again, make sure the phone is COMPLETELY dry! Place down stickers and bits and bobs and decide where you would like to put things!  You could glue just about anything on with some craft glue, just place it on and see where everything looks good before you glue it. My phone isn't finished with this step, but when it is I will add some pictures of that stage in the process! Instead, please settle for some creatively customized phones for a bit of inspiration. 


And then your done!! You have a phone that is almost as cute as you are!  I would love to see pictures of your phones when your finished, please send me some <3 

~!TIPS AND WARNINGS!~ 

* You must be aware of any camera, screen, and flap thing (Like those things that go over your charger slot to protect it and stuff) Be VERY careful in those areas, it can make side buttons harder to push if you don't take a toothpick and slide it along the sides of the buttons where there is now nail polish right away! Just be careful and aware of those things and look over your cellphone well. 
* I'd imagine you could use acrylic paint if you are an artist and had more of that than nail polish and I'd think it would work pretty much the same way, but I don't know a lot about acrylic paint so you may want to do some light research. 
* It can be slightly messy so make sure you paint somewhere you will not make a huge mess. Make sure you   do it over a styrofoam plate or something (that's what I used) and have some paper towels handy. Don't paint in clothes you love love love and would be sad to get messy just in case. 
* I didn't paint the inside of my flip phone and I would NOT suggest it! It seems like a disaster to paint anywhere with all those necessary buttons, plus you need to be able to read them. 
* You could use this method on things that aren't a phone too. I just used my phone as an example. It could work on small things like an MP3 player and stuff like that. I wouldn't suggest trying to paint something like your laptop with fingernail polish! (>v<) 
* If you were concerned about ruining your phone, I would suggest buying some kind of plain cellphone covering and doing it on that and it works just the same and you could have different "clothes" for your phone to wear with your different outfits if you wanted to make more than one. 

(My phone has been done this way a long time and hasn't faded or chipped at all, I don't think that is going to be an issue and will update this post as soon as I have any problems with my phone. So far it is as pink as the day I painted it! )

That is about it for today! I hope you all have a lot of fun with this and will show me the results~ 

Also! I was thinking I might start updating twice a week. Tuesday or Wednesday with something more personal like poetry, short stories, or some of my thoughts and things and then again on Friday with tutorials and reviews like I have been providing. Tell me what you think and vote in the comments what day I should so my other posting and what you would like to see in it. (Also, go ahead and tell me what you would like to see next Friday, open suggestions!) 

Thank you for reading~!!! I was very pleased with my phone after this and I hope you will be too. Also, happy Friday the 13th!~ >V<

Sweetly Yours, 

Skiteanna La~Sweet